Hello & welcome back to the last Casually Crafting Blog Hop of 2021, where this months theme is ‘Sale-A-Bration’. Wahoooo, come January, we will be having lots of free products to give away with qualifying spends, and this blog hop is designed to show you what is on offer! One of my favourite Sale-A-Bration sets is Darling Donkeys, they are so cute and I think they will be very popular.
The Casually Crafting Design Team are a group of independent Stampin’ Up! demonstrators that want to share our take on casual crafting with you all. We will be sharing what we love every 3rd Friday of each month. Make sure you check out the rest of the Design Team’s creative projects from the photo links at the end of this post.
Sale-A-Bration – Darling Donkeys
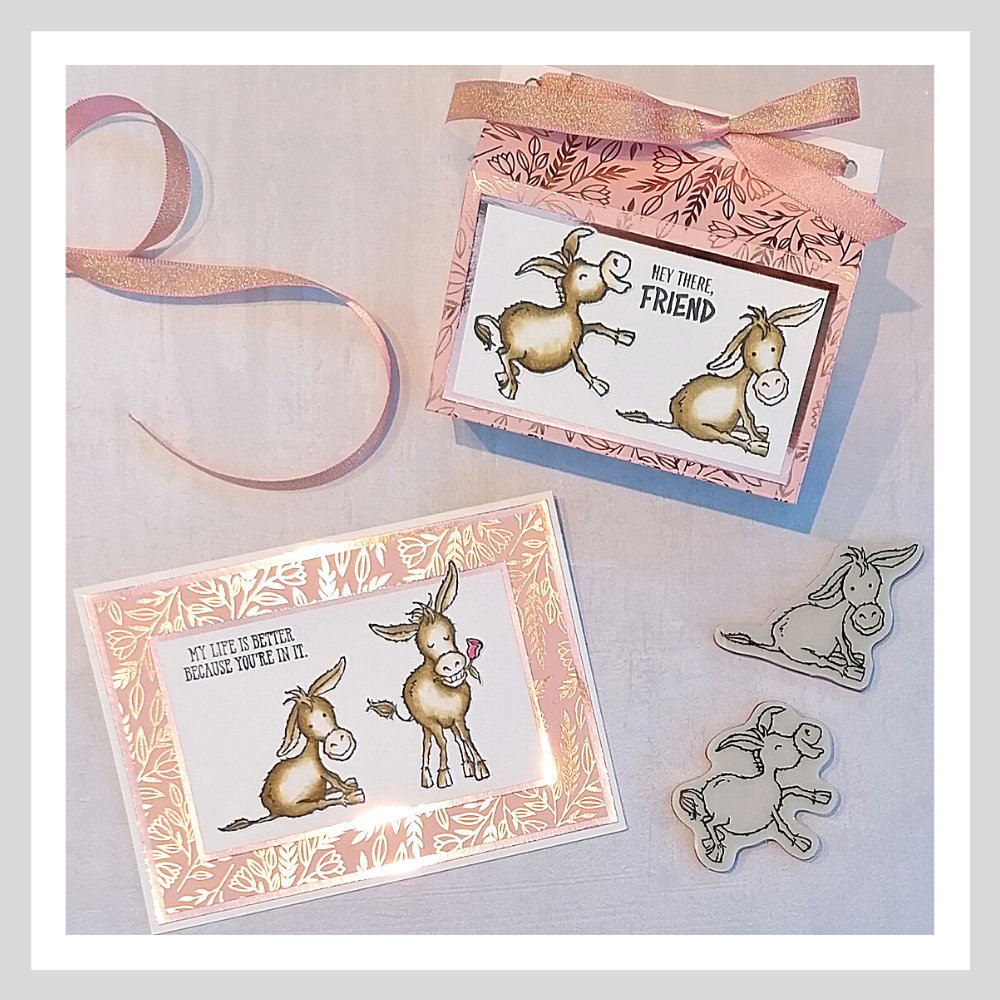
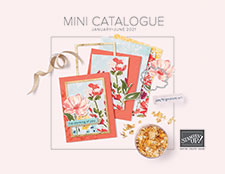
I just love these Darling Donkeys from the Sale-A-Bration catalogue, and as soon as I saw them I just knew I was going to love colouring them in with the Stampin’ Blends alcohol markers. When you think of Donkeys, do you think grey, or brown? I have seen these done in both colour ways and both look amazing, but here I opted for brown, Soft Suede, as I knew it would pair beautifully with the Love You Always speciality DSP, available from the 5th January in the new Jan – Jun Mini Catalogue.
The Darling Donkeys stamp set is available for FREE when you spend £45 with Stampin’ Up! between the 5th January and the 28th February, how cool is that – why not place an order and grab your set so you can make some cute cards for yourself. In fact, if you ordered the Stampin’ Trimmer, the speciality DSP, the foil sheets and the ribbon, you would automatically qualify for the free stamp set!
I also added in some of the Love You Always foil sheets, also available from the 5th January – they come in the most beautiful colours of Blushing Bride, Rococo Rose and Sahara Sand. Look at the papers and foil sheets shining in the light!
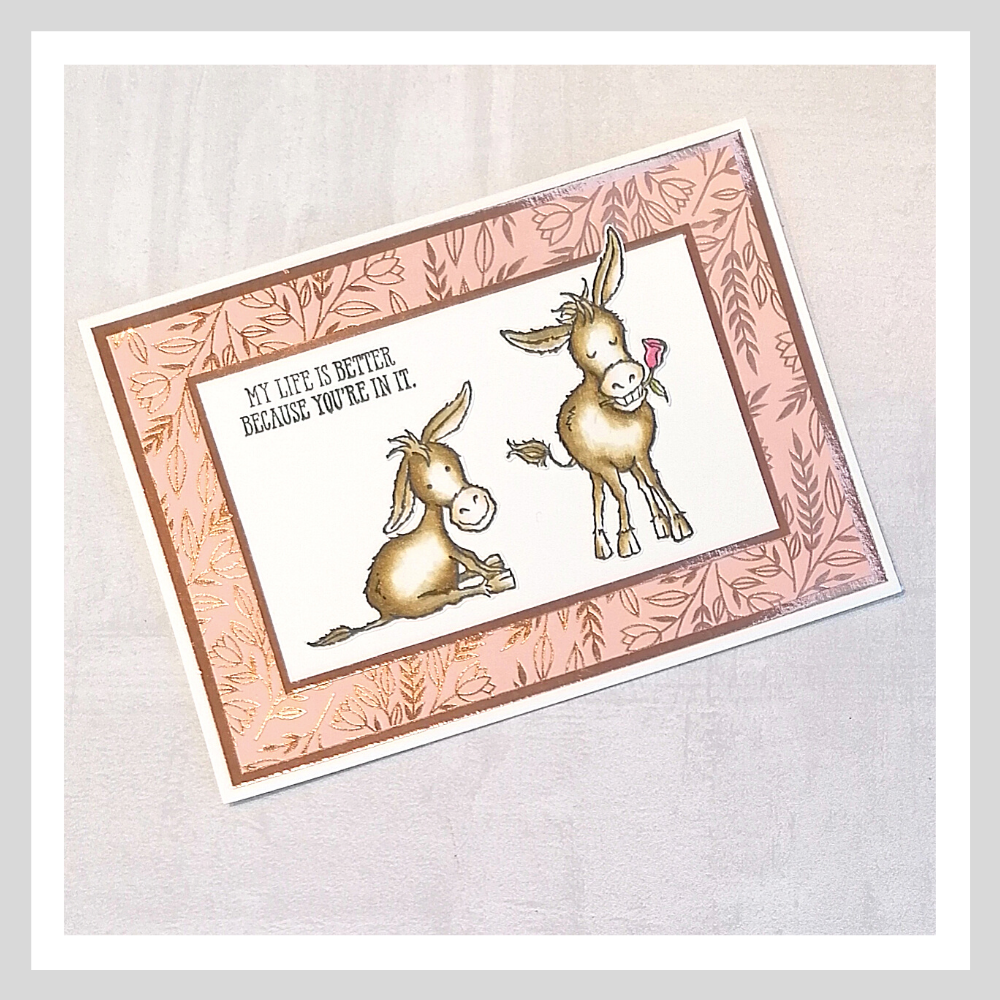
When I coloured in the Donkeys, I wanted to leave some of them white, as this was what I saw in the pictures I looked at online. The Colour Lifter Stampin’ Blend came in very useful here, to blend the brown into the white.
The gift bag/box is also made using the Love You Always Speciality Designer Series Paper, these boxes are so quick and easy to make, and take exactly half of a 12″ x 12″ sheet, so no waste which I LOVE! The ribbon is from the same suite as the papers, it looks almost Rose Gold in colour, so pretty and the perfect match for this project.
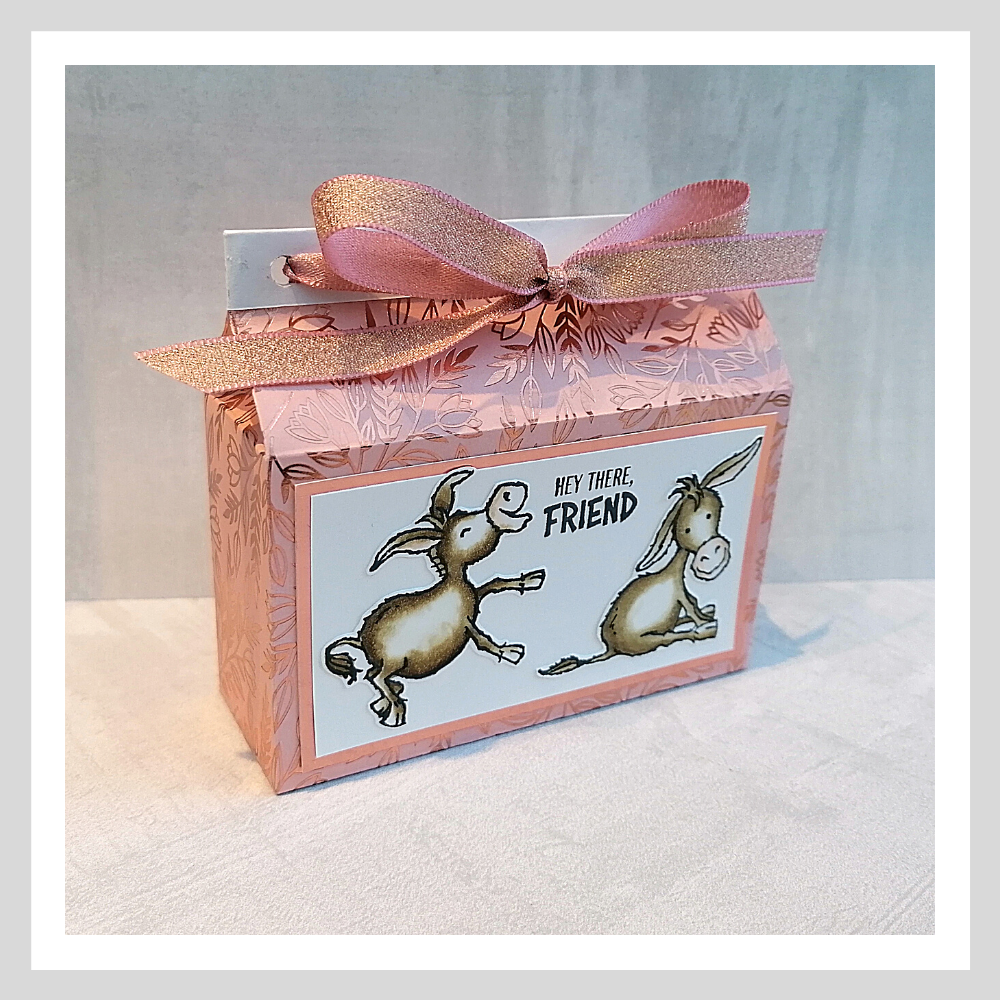
The instructions for making the gift box/bag are below, this was actually one of the first projects I demonstrated at my in person craft group 3 years ago, so it is lovely to see it coming back out again for a play…
How to make the gift box
1. Start with paper measuring 12” by 6”
2. Turn the paper over so that the design that you want on the outside cannot be seen.
3.With the long side of the paper at the top, horizontally, score at 4 ¼” and 5 ¾”, 10” and 11 ½”
4. Turn the paper 90 degrees and score on the short side at 1 ½”, 4” and 5 ½”
5. Fold and burnish all of the score lines.
6. The thin, long strip is the top flap of your box, and should be folded the opposite way to all of the other score lines. Glue this flap down to create a decorative edge along the top of the box.
7. With this strip at the top, cut away the bottom right hand rectangle, a very small piece.
8. With the paper in the same position, cut up the shortest vertical lines until you meet the horizontal line.
7. Fold over the short flap on the right hand side and place glue all the way down.
8. Take the left hand edge of the paper in your left hand and fold it over to the right, so that the edge covers the glued section. Line it up and stick it down.
9. Glue the bottom flaps and stick down to assemble the bag.
10. Now, you should have something that resembles a box with no lid. To create the closure, pinch the top edges together to mould the box and then punch a hole through the thickest part at either end.
11. Cut a length of ribbon to approximately 50 cm and pass through one hole and back through the other, ensuring that the ends are loose at the front of you gift bag.
12. Tie the loose ends into a bow and then cut off any excess, cutting at an angle to give a neat and tidy finish.
13.To create the label, cut two pieces of card, one coloured and one white. Cut the coloured piece to 4” by 2 ¼” and the white piece to 3 ¾” by 2”.
14.Stamp the white piece with sentiments and images of your choice, in the colour of your choice.
I hope you enjoy looking at all of the projects that the rest of the team have for you, to wet your appetite for things to come! It’s going to be a great couple of months and I hope you all manage to get a freebie or two.
Don’t forget to come back after you have finished the hop to request a catalogue if you don’t already have a demonstrator, but for now, enjoy hopping and seeing what the rest of the Casually Crafting Design Team have been to this month on the theme of Sale-A-Bration. I can’t wait to see what projects they have for you!!
Until next time, Happy Stamping xx
 |  |  |  |
- Shop with me online – use Host Code SSDNFUA6 if spending between £25 and £150 to receive a FREE surprise from me in May.
- Click Here to come and join our amazing team of Songbird Stampers, a whole new world of fun and friendship (and discounts!!) await you. Want more information? Why not check out all the FAQs over on the Join My Team page
- Why not follow me on Facebook, for live videos, projects and updates – The Songbird Stamper
- Or Subscribe to me on YouTube – The Songbird Stamper
Stampin’ Blends Course

Bookings are now open for my next Stampin’ Blends Course, starting on Sunday 5th February 2023, with four zoom classes running over several months (to give you plenty of time to practice in between). All of the classes are recorded into a Private Facebook Group too, so you can watch and rewatch as many times as you like. The course also includes a 17 page written course guide, with accompanying worksheets.
There are two options for this course, a product based option (available UK only) and an online only option (available WORLDWIDE). The online only version is £70 and the product based version is £180 – for which you get access to the whole course, the course guide, £180 worth of product (4 stamp sets and 21 Stampin’ Blends) Sale-A-Bration goodies and free postage too.

Because you also get your choice of 4 level one Sale-A-Bration items, this option is a real bargain if you love Stampin’ Up! products, and as always you are free to swap out for other product of your choice.
If you would like to learn all my tips, tricks and techniques, please do visit this page to sign up or register your interest today!